
Origami Balloon Instructions Printable: A Fun and Easy Guide


Getting Started with Origami Balloon Instructions
Origami, the ancient Japanese art of paper folding, has been a popular hobby for centuries. One of the most fun and creative origami projects is the origami balloon. With just a few simple folds, you can create a beautiful and intricate balloon that is perfect for parties, events, and everyday fun. In this article, we will provide you with printable origami balloon instructions that are easy to follow and require minimal materials.
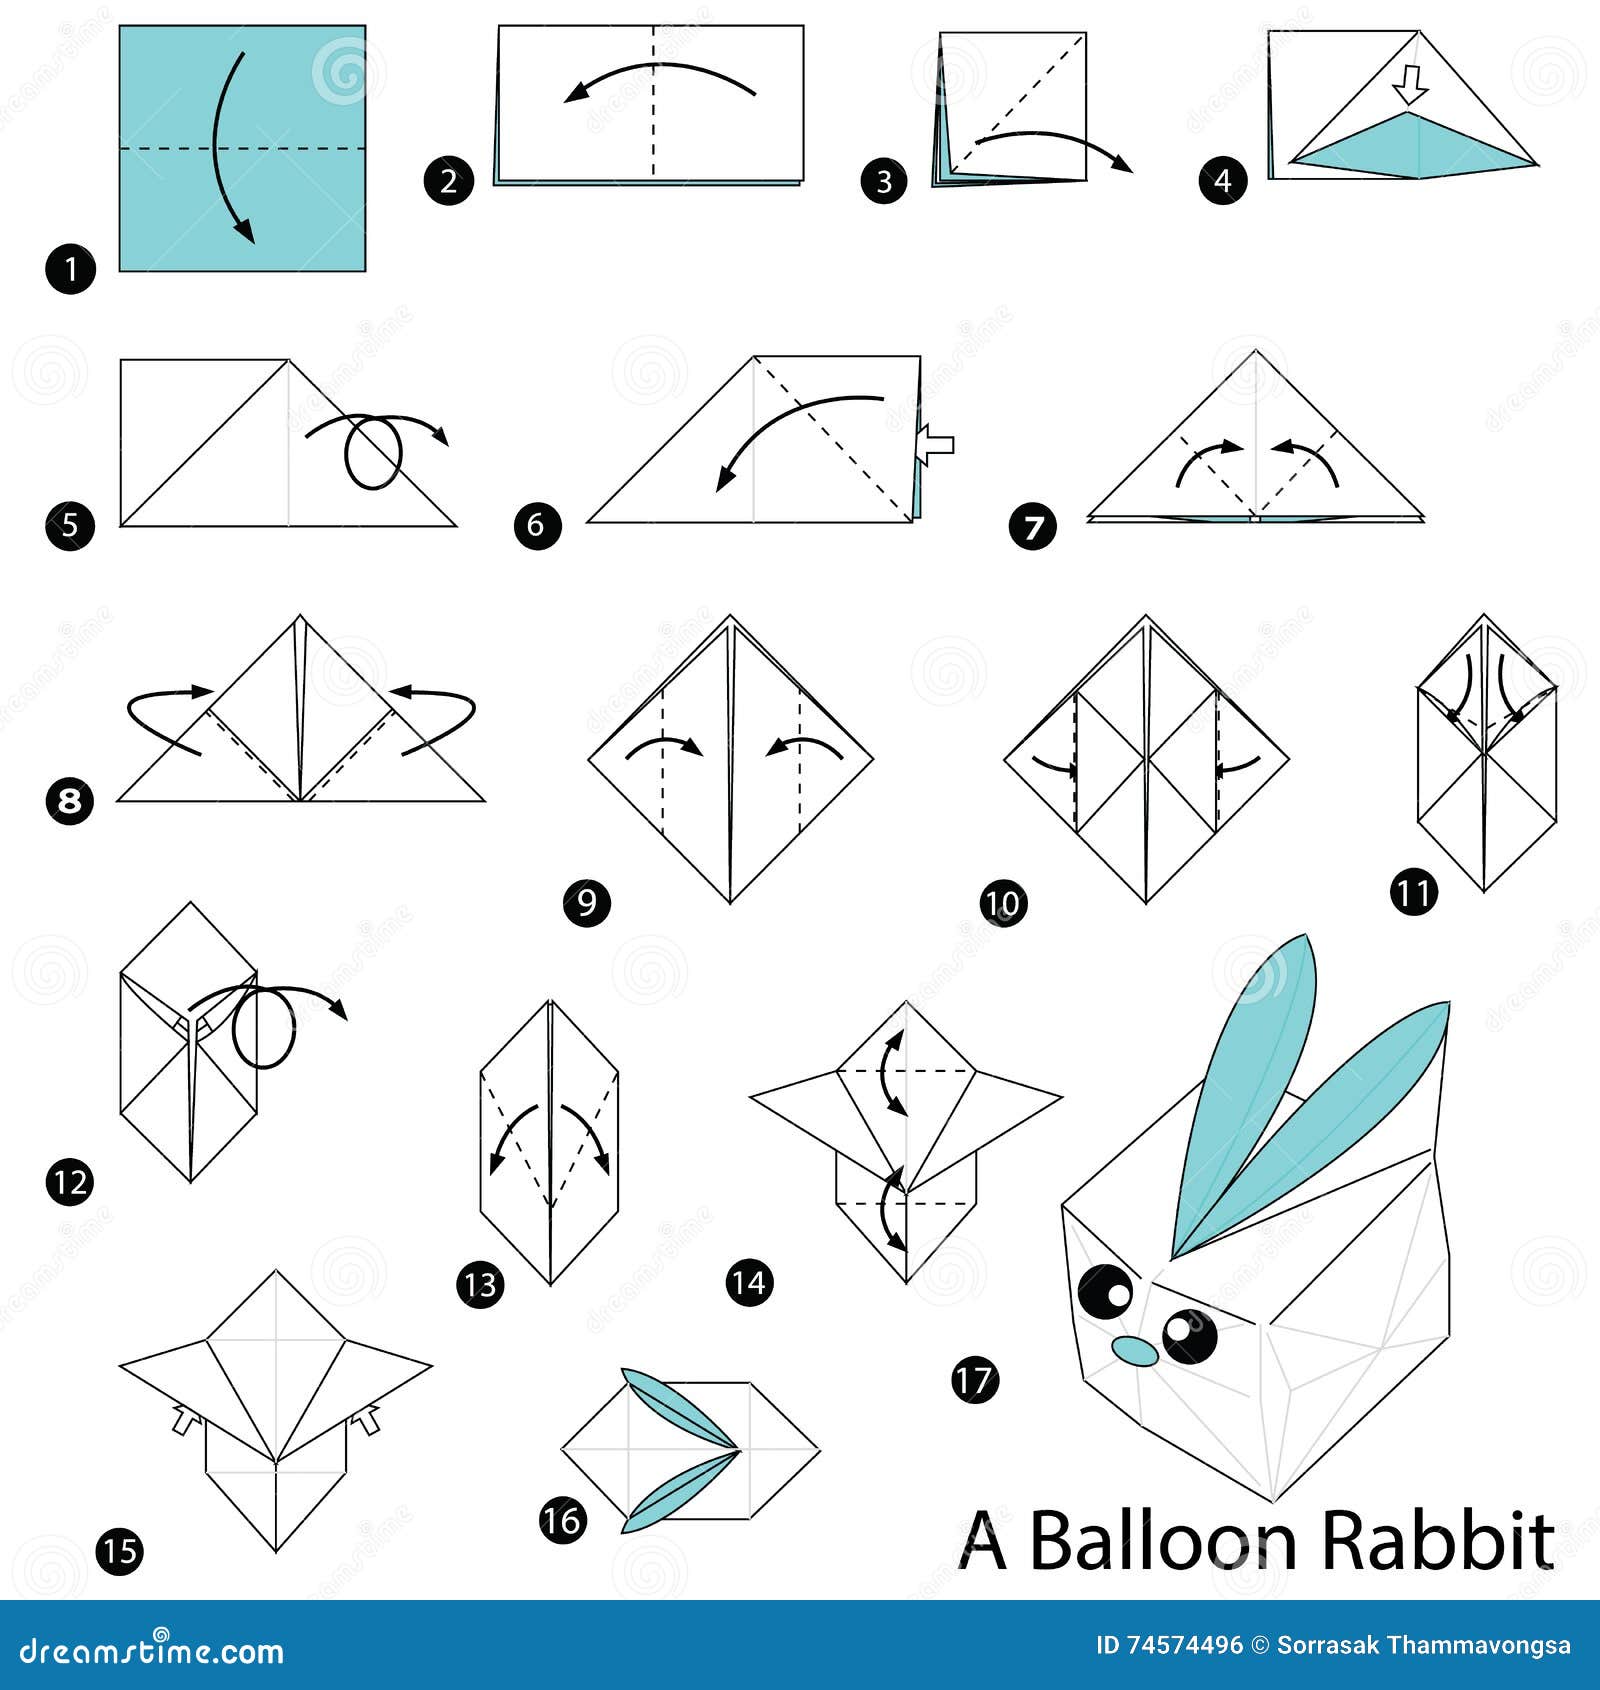
To get started, you will need a square piece of paper, preferably colored or patterned on one side. You can use any type of paper you like, but it's best to use a paper that is not too thick or too thin. Once you have your paper, you can begin following the origami balloon instructions. The instructions are designed to be easy to follow, with step-by-step diagrams and clear instructions.
Tips and Variations for Your Origami Balloon
The first step in making an origami balloon is to fold the paper in half diagonally to create a crease. Then, you will need to open the paper back up and fold the top left and right corners down to the middle crease. Next, you will need to fold the bottom left and right corners up to the middle crease, making sure to align them with the top corners. From there, you can begin to shape the balloon by folding the paper in and out, creating the balloon's distinctive shape.
Once you have mastered the basic origami balloon instructions, you can start to experiment with different variations and designs. You can use different colors or patterns of paper to create unique and interesting balloons. You can also add decorations, such as stickers or stamps, to make your balloon even more special. With a little practice and patience, you can create beautiful and intricate origami balloons that are perfect for any occasion. So why not give it a try and see what you can create?